Setting sound alerts in your experiences will help your reps be notified quickly of any hot leads on your site. Reps can easily mute sounds while they are on calls and keep them on during the day to be alerted while away from their desk so that they can jump on and engage visitors right away.
Getting Started
There are two different ways that you can set up alerts within your experience:
- Create a step specifically to alert your team regarding certain visitors or
- Set a sound alert when a visitor is qualified and routed to your team.
Creating an Alert Step
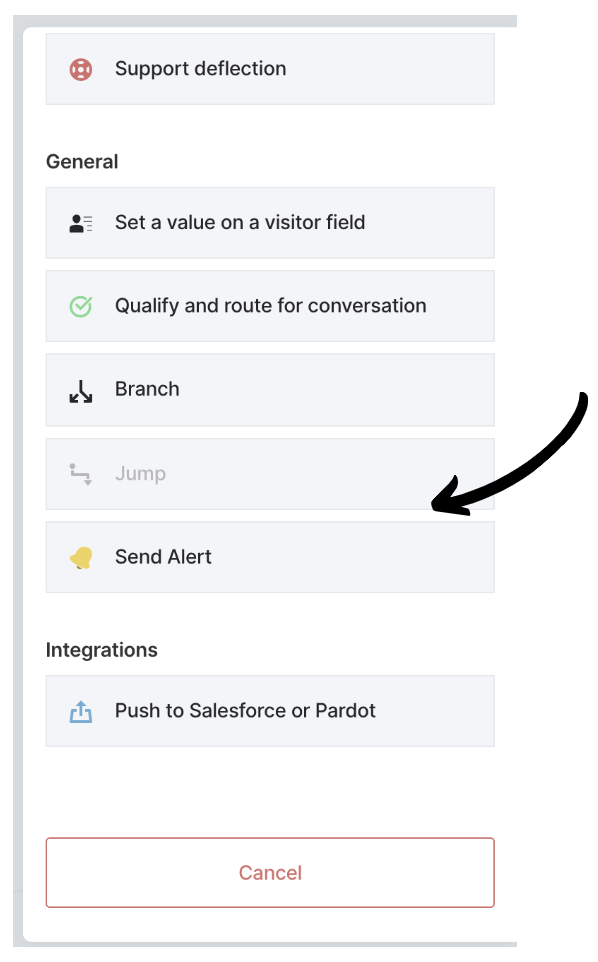
You can send a sound alert at any point in the experience by creating a specific step and selecting the option ‘Sound Alert’ as shown below.

Before setting up this step you might want to consider the certain criteria in which you’d like for the alert to play and who you’d like to get the alert.
For example, if you use Clearbit Reveal, you’ll be able to tell immediately when a visitor comes onto your site if that visitor belongs to a company with a certain employee size. Setting up a rule earlier on in the experience to capture this information and then playing the alert sound to your sales team might help them quickly be alerted to high value visitors on the site.
To do this:
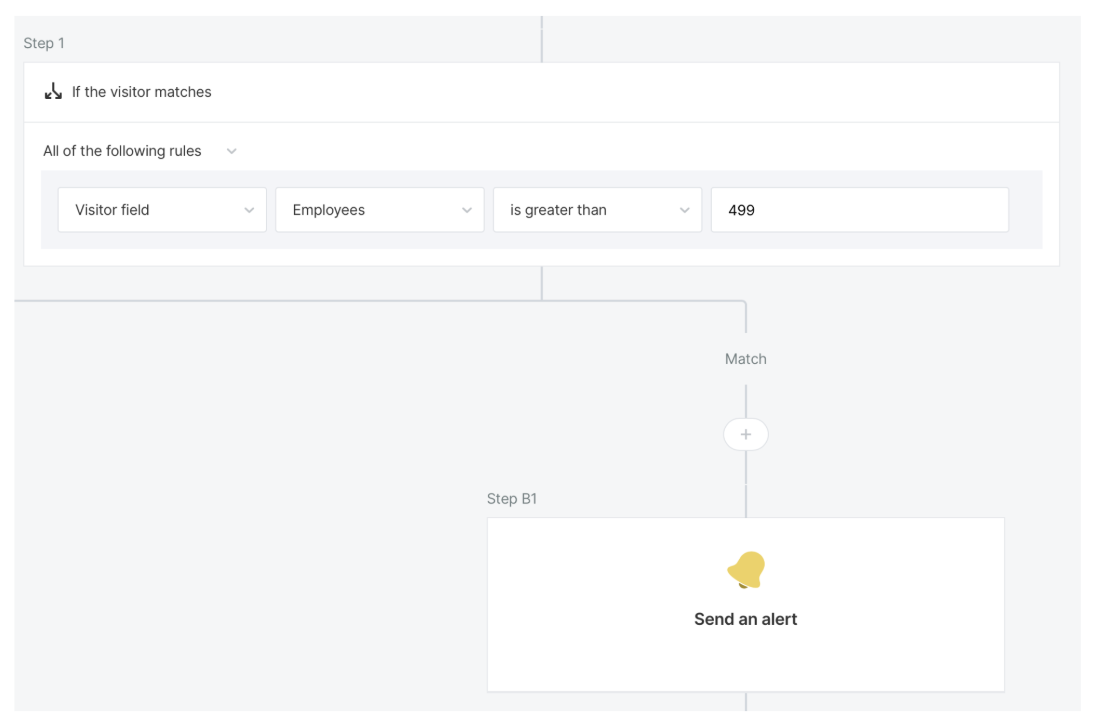
- Create a branch step that looks at your Visitor Field for employee size.
- Set your rule to alert based off the employee size (for example: greater than 500).
- Create the next step and select to send an alert.

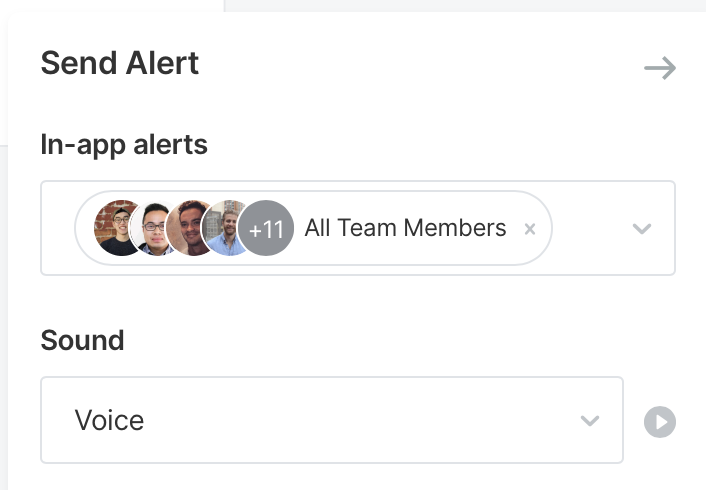
By setting up a specific step for the sound alert you can also add a few other customizations to your alert such as: only sending the alert to a certain group of your reps or only one particular rep. For example, if you have a sales team that takes care of your high-value customers you might just want to send the alert to them specifically as shown below rather than your whole sales team.

Alerts
Looking to learn more about the different types of alerts in Qualified? Check out our article on Configurable Alerts.
Using Variable Tags in Voice Alerts
If you're interested in using our voice alerts, you'll also want to be aware of using variable tags to customize the alerts your team receives. Using our variable tags you can add in certain information about the visitors on your site like their name, location, employee size or other qualifying information. If you have a Clearbit Reveal account this information can come directly from Clearbit Reveal as soon as the visitor steps on the site, or if they are a known user and someone who has visited before, we'll remember them and pull this information about them.
For example, let's say you want to be alerted every time someone visits your pricing page. Even more detailed than that, you'd like to alert your sales team of the company that the visitor works for. You have a Clearbit Reveal account, so you're already mapping this information into your Visitor Fields and can therefore use our variable tags. You'll want to note you can use variable tags any time that the information is known about the visitor via Salesforce, Pardot, or if they are a known user that has already visited your site and you've collected this information about them.
To get started, edit the experience that you'd like to add your voice alert to and go into the sound alert settings. From here, make sure you have the voice option selected and begin placing in the text of the message that you'd like it to read. Remember to add fallbacks by using a pipe to separate your fallback term from your variable tag (as shown in the example below). To get a full list of variable tags that are available, check out our variable tag library.


.svg)


